Saturday, August 3, 2013

TOMATO CURRY


There are some recipes which  are family recipes and cannot be found in cookery books.Tomato curry is one such recipe.Basically it is a tomato soup mixed with steamed vegetables and hot spices.It is eaten steaming hot with bread/or pav and butter.Thats it.

Believe me its unsual spicy taste is awesome .

Do you know how to make tomato curry?my husband had asked me when we first met.I said ya—aa—very confidently. You see I was trying to impress him.I had never ever heard of this dish and kept wondering whether he was trying to gauge my culinary skills .

image498.jpg
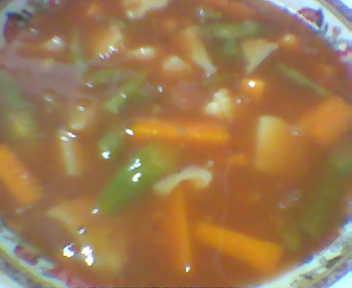
The name of the recipe is very misleading.You must be imagining that it has chunks of tomato with some gravy. Even I had the same impression, until I saw it being made in my sis in law’s house.I don’t know the origin of the recipe but all I know is, it has been fondly made in the family  for ages.

INGREDIENTS:-

5 medium size tomatoes

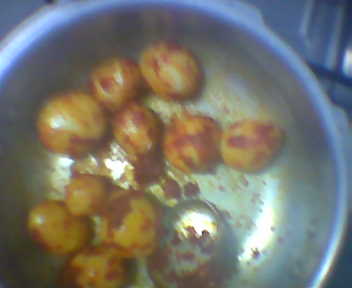
1 cup steamed mixed vegetables(beans ,cauliflower. peas, carrots, baby corn etc)

1 tsp oil

salt and sugar to taste

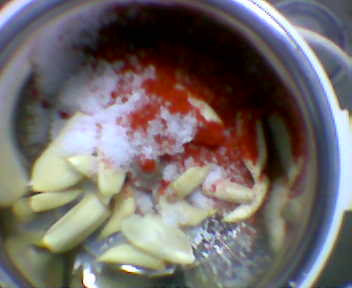
Masala to be ground into a powder

2 red chillis(increase or decrease the quantity according to your taste)

1 tsp corriander seeds

2 cloves

1/2” cinnamon pieces

1 green cardamom

1/2 tsp moti saunf

1/2 tsp black pepper

Method:-

Boil the tomatoes in 2 cups of water in a pressure cooker. Let it cool, then blend and strain it in a soup strainer. Add water to correct the consistency. The soup should neither be thick nor too watery.

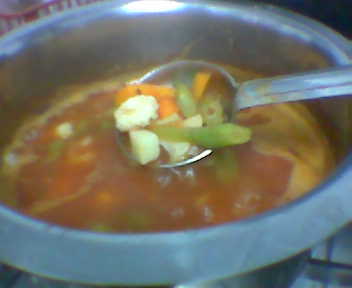
Mix the steamed vegetables with the soup.
image496.jpg


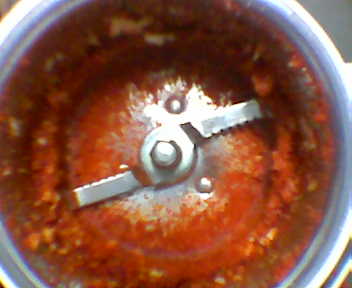
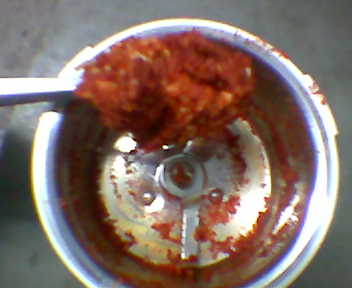
Using the 1 tsp oil slightly roast all the masala ingredients till you get a nice aroma of spices. Cool and grind to a fine powder.Add this masala powder to the above soup mixture.

Add salt and sugar to taste.It should taste sweet n sour.

Boil the entire curry for 3-4 minutes. Serve hot with warm pav or bread with offcourse butter .

The curry can be made as fiery or mild by increasing or decreasing the red chilli content .Works well in winters, is a meal in itself.Enjoy!!!!

Friday, August 2, 2013

GARLIC POTATO


Most of the dishes I have been making all these years are either from books , friends ,Tv. But this one was shared by my maid Ja when we stayed in Delhi. Ja cooked well and so I got to learn quite a few dishes from her.

I remember Ja. for all the services she rendered to us. The memories of those days come alive when I prepare this dish :)

INGREDIENTS

12-14 egg size or small potatoes. (boiled and peeled but not overcooked)

1 whole pod of garlc(around 15 cloves of garlic)

1 heaped tsp of chilli powder

salt

3Tbsp oil

Method:-

Peel the potatoes.Make a paste of garlic salt and chilli powder, without adding water.

image107.jpg

Heat oil in the fry pan. Add the red garlic paste. Fry for few seconds.Do not let it turn brown.

image108.jpg

image109.jpg

Add the boiled and peeled potatoes. If you want to serve it right away then saute on high flame till the garlic paste sticks to the potatoes. The potatoes become crisp and red hot.

image110.jpg


image123.jpg

But if you want to serve it later, then after adding potatoes to the paste saute on medium heat for2-3 minutes. Before serving just saute on high heat till potatoes are crisp .If you desire squeeze lemon juice on top or sprinkle chaat masala.

HOME MADE LEMON SQUASH - NO PRESERVATIVES

This recipe is again one of my favourites so easy to make and no preservatives!

We had a big lemon tree when we stayed in Deolali Nasik.

Nearly the whole year the tree gave so many lemons, that after distributing, there were enough left with me.

So in those two years I made all types of pickles and this lemon squash.

This squash is so easy to make , no preservatives, no citric acid, water etc is required .

You need Lemons and Sugar, few clean and dry soft drink bottles, thats it :)

Before starting ensure the bottles are clean and totally dry.The lemons should be washed and dried so that there is no moisture. The squeezer, knife , cutting board, steel bowl, should be clean and dry.This is very important as it will ensure the squash does not catch fungus.

METHOD

Fill any size bottle with sugar till a certain level. It can be till its neck or slightly lower. Just mark the level of the sugar in the bottle with a sketch pen or marker.We need to add lemon juice till the level of the sugar.

image975.jpg

Squeeze the juice of lemons in a steel bowl with a squeezer. Pour this juice up to the marked level.

Do not shake the bottle while pouring.

image978.jpg

You will notice the sugar dissolves and its level comes down.

Close the lid of the bottle and shake and shake. Good exercise for your arms .

image989.jpg

You will notice that the sugar level goes further down and settles at the bottom around 1-1/2 inch after few hours.

In course of time may be month or so the sugar will slowly dissolve. Even if it does not dissolve totally do not worry.Its presence will not make any difference to the taste.

Just before using, shake the bottle well and pour into a glass and then pour chilled water over it and stir. The quantity of the concentrate depends on your taste. Normally for one glass 2 Tbsp is ok.

No need to add extra sugar.

I kept this squash in a cool dark place. It lasts and lasts.

Some of my friends kept these bottles in the sun for a few days. I did not keep it in the sun at all.

Lasts for ages. My last of the bottles got over after 3 years. So you can imagine the number of bottles I had made ! :D

One thing I would like to mention. Initially the colour is pale yellow. As time passes around a year the colour deepens to golden yellow.

If you keep it for ages like me the colour turns brownish. There is no change in taste at all.

So now I make a jaljeera from this squash. I add roasted jeera, kala namak, and black pepper and ice :D )))

HOME MADE BLACK GRAPE WINE


This is one my signature recipes which I still make.
We were staying in Nasik when my friend gave me a wine recipe.All the four years I stayed there I made this wine.There were vinyards close by , so in February every year this had become a regular ordeal.Once the grapes came my work started


image127.jpg

Making wine at home is easy except prior preparation is required .

1. Firstly you require a plastic drum or a plastic bucket preferably of lighter colour, colourless will be ideal.It should have a lid also.I had specially bought one huge drum (in which you store water).

Choose the size of the drum keeping in mind the quantity of grapes, the amount of water required and enough space for fermentation.


image129.jpg

2.A bucket to strain the wine .Ihad bought a new one because I was going to need it every year. Those of you who want to make in small quantities can use plastic container in which you store groceries.

3. Plastic net strainers. Clean kitchen towels.

4. wooden spatula.

5. Packing tape

6. plastic soft drink bottles

Items no. 2, 3 , 4 , 6 you will require only after 20 days.On the first day you require the drum and spatula and the tape.

Ingredients:-Black grapes-2 kg

sugar- 1kg+700gm

water-4 litre+500ml

wheat 250 gm

dry yeast- arround 1 heaped Tbsp

Method:- First wash the grapes ( along with their stems), spread them on a clean cloth .You can do this overnight. Also wash the wheat and keep it separately in a strainer or cloth.

Then take water (I used filtered water) , and boil it.Use the water only when it is luke warm.

Once the water reaches luke warm temperature crush the grapes in a food processor.

Put the crushed grapes+ water + half of the sugar + wheat + yeast at this stage. Stir with the wooden spatula .Close the lid of the drum and put the packing tape to seal the mouth of the drum .Mark the date on the calender . Keep the drum in a dry undisturbed place.

After 20  days open the drum. Line the strainer with the kitchen cloth .If you put more than one cloth the better.Strain the wine in the plastic bucket with the help of a plastic glass or a plastic jug . You may need some one to help you.Don’t wash the drum with water at this stage.It will look dirty but still DON’T.

Pour back the strained wine back in the drum. At this stage you have to put the left over sugar in the wine . But before that just taste the wine for sweetness .Put the sugar according to the sweetness you require in the wine.Everyone’s taste differs.

Stir again,close the lid and pack it up with the packing tape again.

Mark the date on the calender.

After 20  days again repeat the above procedure for final straining. This time keep clean n dry bottles ready. I used 2litre Soft drink bottles.Keep the drum on a chair 2-3 hours before you actually want to strain it. This will help in settling down the sediments at the bottom of the drum.Keeping the drum on the chair will prevent you from bending down every time. Slowly strain the wine in the bucket with the help of a plastic jug . Pour it in bottles. Don’t fill them to the top . Keep some space.. Use the wine after 3 months or soon after bottling if your hubby can’t wait. It tastes better with time .

With this recipe you will get around two bottles 2 litre each , or five rum bottles which are 750 ml each.

All those guests (some from abroad too) who have tasted my wine liked it a lot. So happy wine making to you all .One feels proud to say I have made it .

HI FRIENDS


Hi Friends !

After a big gap I am back with my tried and tested recipes.My previous blog  was  http://luv2eathate2cook.wordpress.com/
I plan to continue my journey in food blogging with this new blog.
Hope you all will join me and make this journey enjoyable.